Integrating a CDN can make a huge difference to your website’s performance, especially when running a WordPress site with mostly dynamic content.
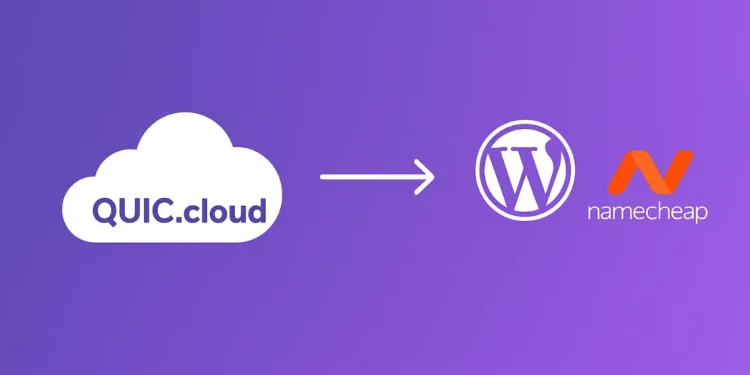
In this guide, I’ll share my real-world experience of integrating QUIC.cloud with my WordPress website hosted on Namecheap, the challenges I faced, and how I resolved them.
Table of Contents
Why We Needed a CDN
As our website traffic started to grow, performance and SEO became top priorities. At that stage, a reliable CDN was no longer optional; it was essential.
We needed faster load times globally, better caching for dynamic content, and enhanced security, all while keeping our server load manageable.
Since our site runs on WordPress with a LiteSpeed server, QUIC.cloud was the most logical choice.
What Makes QUIC.cloud Special for WordPress + LiteSpeed
QUIC.cloud is a CDN specifically designed for WordPress sites running on the LiteSpeed Web Server.
It integrates seamlessly with the LiteSpeed Cache plugin, providing full-page caching, image optimization, critical CSS, and DDoS protection, all designed to work natively with WordPress.
Unlike traditional CDNs, QUIC.cloud understands how WordPress functions and optimizes intelligently around it.
Initial Setup
To connect the domain to QUIC.cloud, the easiest path is through theLiteSpeed Cache plugin.
Our initial goal was simple:
- Enable CDN services
- Activate image optimization
- Generate an SSL certificate through
QUIC.cloud
DNS and CDN Goals
Our setup plan looked like this:
- Connect the CDN using a subdomain (
quic.webdevstory.com) - Keep
Namecheapas the DNS provider - Avoid switching nameservers
- Serve the website through
QUIC.cloudfor faster speeds and global caching
Attempting to Connect via quic.webdevstory.com
We initially followed the default QUIC.cloud recommendation and attempted to map the CDN to quic.webdevstory.com.
After adding the required CNAME record in Namecheap (pointing to c3401933.tier1.quicns.com), verification still failed. QUIC.cloud continued showing an A record conflict, even though the old A record had already been deleted from Namecheap.
The Roadblocks
1. CNAME vs A Record Conflict
DNS doesn’t allow both an A record and a CNAME record for the same subdomain.
Unfortunately, an old A record for quic was still cached within QUIC.cloud’s system, resulting in ongoing verification errors.
2. Namecheap Not Supporting CNAME Flattening
QUIC.cloud also attempted to verify the root domain (webdevstory.com) using a CNAME. However, Namecheap doesn’t support CNAME flattening for root domains, meaning we couldn’t point the main domain directly to QUIC.cloud’s edge servers.
3. SSL & DNS Verification Stuck
Even after adjusting DNS settings, QUIC.cloud failed to verify the domain due to the stale cached A record.
As a result, SSL certificate generation got stuck, and the CDN status remained “Bypassed”.
The Fix
Switching to the www Subdomain
The most practical solution was to route all traffic through www.webdevstory.com, a subdomain that fully supports CNAME records. This allowed us to point www directly to c3401933.tier1.quicns.com without conflicts.
Cleaning Up DNS Settings in Namecheap
We refined our Namecheap DNS zone by:
- Deleting the old
A recordforquic - Removing the existing
CNAMEthat pointedwwwto@ - Adding a new
CNAME:www → c3401933.tier1.quicns.com - Keeping the
A recordfor@pointing to our server to handle redirects
Adding .htaccess Redirects (non-www → www, HTTP → HTTPS)
To ensure consistency and SEO benefits, we added the following rules to our .htaccess file:
    # Redirect non-www to www
    RewriteEngine On
    RewriteCond %{HTTP_HOST} ^webdevstory.com [NC]
    RewriteRule ^(.*)$ https://www.webdevstory.com/$1 [L,R=301]
    # Redirect HTTP to HTTPS
    RewriteCond %{HTTPS} off
    RewriteRule ^(.*)$ https://%{HTTP_HOST}%{REQUEST_URI} [L,R=301]
This ensured all visitors accessed the secure, QUIC.cloud-powered www version of the site.
Common Mistakes to Avoid
If you’re integrating QUIC.cloud with WordPress on Namecheap, keep these lessons in mind:
- Don’t use a
CNAMEon your root domain. Namecheap doesn’t support flattening, so always use a subdomain (e.g.,www). - Remove all old
A recordsbefore adding a CNAME; otherwise,QUIC.cloudmay cache stale data. - Wait for DNS propagation (usually 30 – 60 minutes) before verifying your domain in
QUIC.cloud. - Purge your
LiteSpeedandQUIC.cloudcaches after setup to prevent mixed results. - Set up proper redirects early (non-www → www and HTTP → HTTPS) for SEO and consistency.
Final Thoughts
After completing these steps, QUIC.cloud connected successfully, SSL was verified, and caching began working as expected.
The main takeaway? Use the www version when integrating QUIC.cloud with Namecheap, clean your DNS records carefully, and allow sufficient time for DNS propagation to complete.
Once everything syncs, you’ll enjoy a noticeably faster and more stable WordPress site.
🚀 Before You Go:
- 👏 Found this guide helpful? Give it a like!
- 💬 Got thoughts? Share your insights!
- 📤 Know someone who needs this? Share the post!
- 🌟 Your support keeps us going!
💻 Level up with the latest tech trends, tutorials, and tips - Straight to your inbox – no fluff, just value!